1. SAML Federation
How Does SAML Work?
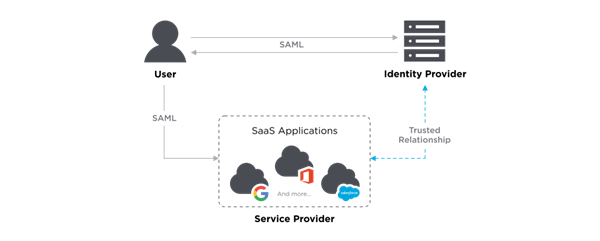
SAML works by exchanging user information, such as logins, authentication state, identifiers, and other relevant attributes between the identity and service provider. As a result, it simplifies and secures the authentication process as the user only needs to log in once with a single set of authentication credentials. So, when the user tries to access a site, the identity provider passes the SAML authentication to the service provider, who then grants the user entry.
| Step | Description |
|---|---|
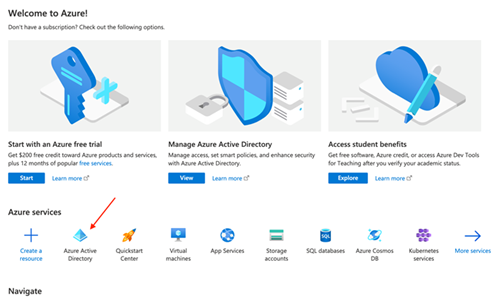
| 1. Login to Azure portal: https://portal.azure.com/#home 2. Select Azure Active Directory |
 |
| 3. Select Enterprise applications from the navigation menu | 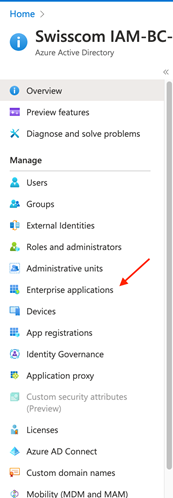 |
| 4. Select New application | 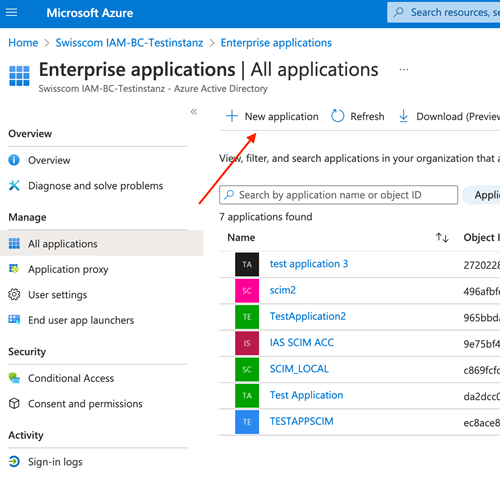 |
| 5. Select Create your own application | 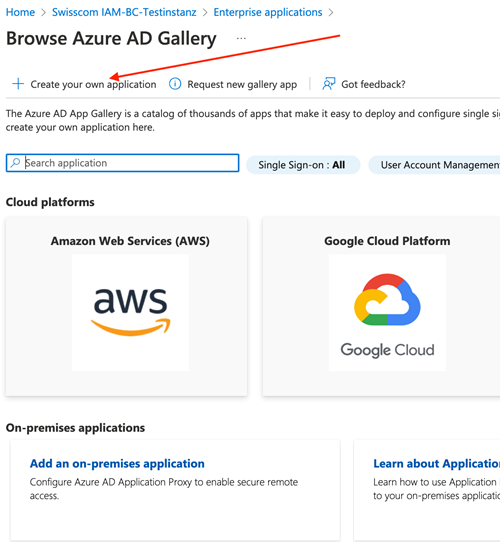 |
| 6. put a name for the application, select Non-gallery radio button & create | 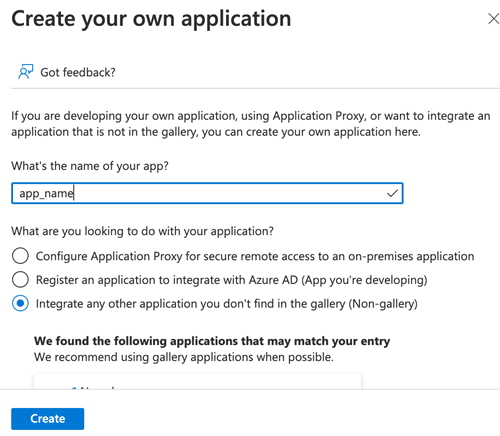 |
| 7. Select Single sign-on from the navigation menu | 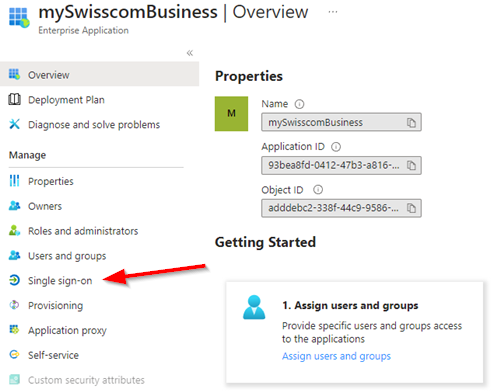 |
| 8. Select SAML | 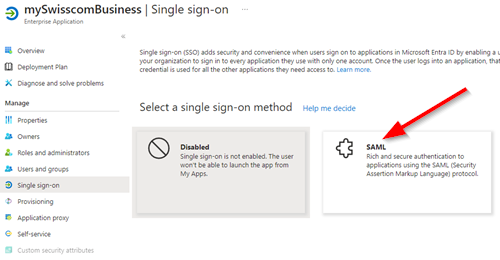 |
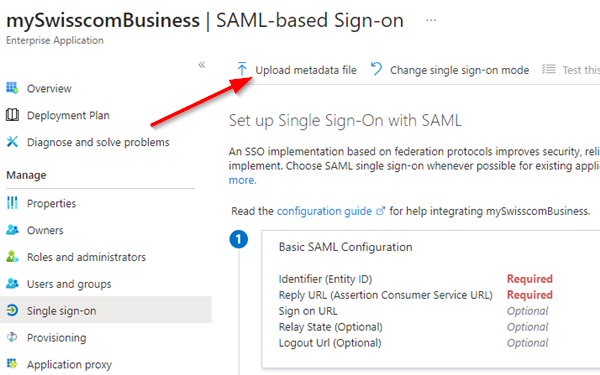
| 9. Select Upload metadata file The metadata file can be dowloaded here (right click, save link as…) |
 |
| 10. Select Add |  |
| 11. Select Save | 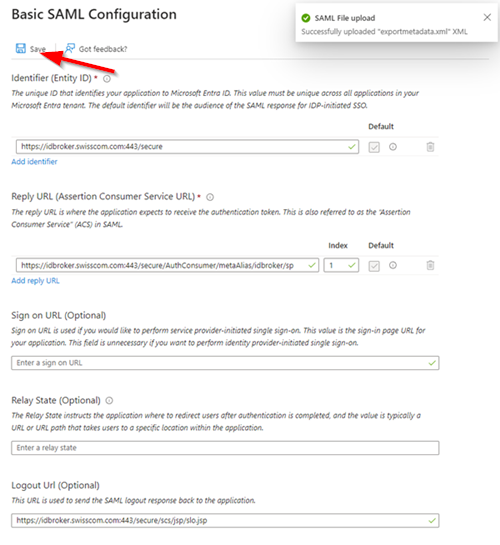 |
| 12. Select No I’ll test later |  |
|
|
Claim attributes
Claim attributes can be configured in the Azure portal or with Powershell.
If the claim attributes are configured in the azure portal, the attributes can also be edited there. Otherwise, if the claim attributes are configured with Powershell, the attributes can only be edited with Powershell.
| Step | Description |
|---|---|
| 1. On Attributes and claims select Edit |  |
| 2. Under Required claim select Unique User identifier (Name ID) |  |
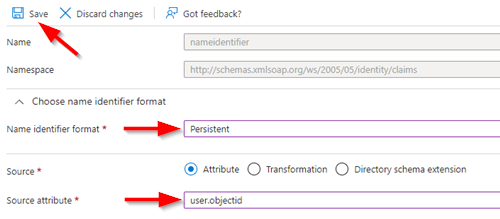
3. Modify Name identifier format to PersistentModify Source attribute to user.objectidSelect Save |
 |
| 4. Select Add new claim | 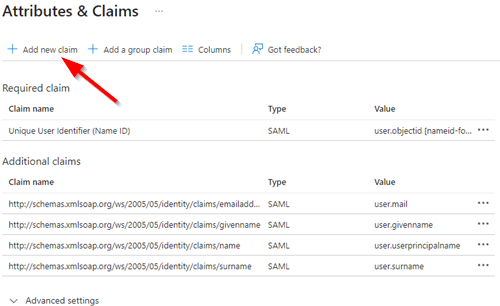 |
| Add following claims: |
Name |
Namespace |
Source |
Source attribute |
|---|---|---|---|
| country | http://schemas.xmlsoap.org/ws/2005/05/identity/claims |
Attribute | user.country |
| postalcode | http://schemas.xmlsoap.org/ws/2005/05/identity/claims |
Attribute | user.postalcode |
| streetaddress | http://schemas.xmlsoap.org/ws/2005/05/identity/claims |
Attribute | user.streetaddress |
| upn | http://schemas.xmlsoap.org/ws/2005/05/identity/claims |
Attribute | user.userprincipalname |
| userGUID | http://schemas.xmlsoap.org/ws/2005/05/identity/claims |
Attribute | user.objectid |
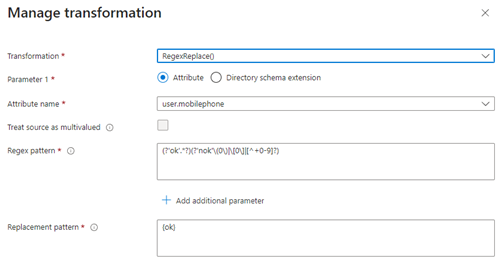
| mobilephone | http://schemas.xmlsoap.org/ws/2005/05/identity/claims |
Transformation |
Step |
Description | ||||||||||||
|---|---|---|---|---|---|---|---|---|---|---|---|---|---|
|
 |
|
|
Please contact your Swisscom contact person to configure the counterpart on Swisscom side.
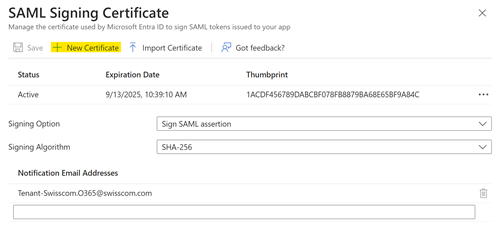
During the configuration of SAML SSO a three years valid certificate is created. If the certificate become invalid, the certificate must be renewed. The certificate can be renewed with the following procedure
| Step | Description |
|---|---|
| 1. In the section 3. SAML Certificate select Edit Select new Certificate |
 |
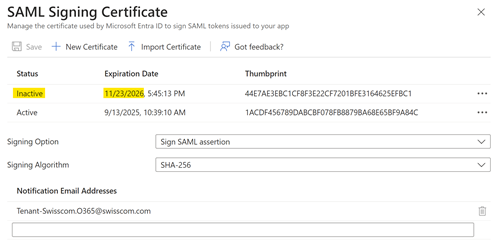
| 2. The new certificate is inactive, select … and Make certificate active to activate the certificate Certificate can only be activated if the counterpart has integrated it (see bellow) |
 |
| 3. Inform Swisscom giving the App Federation Metadata Url to integrate the new certificate | 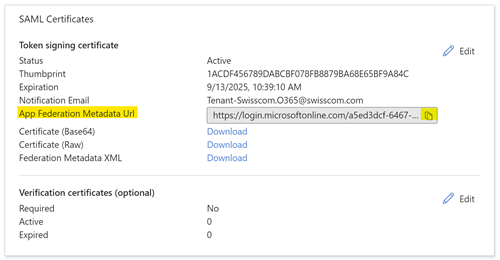 |
| 4. To the Notification Email Address entered during the App creation (multiple addresses can be added) an Email is sended 60, 30 and 7 days before the certificate expires | 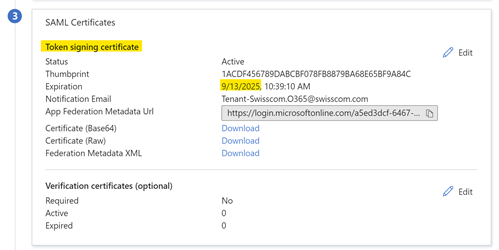 |
Swisscom monitor the certificate expiration and will inform you about the integration of the new certificate.
2. SCIM Provisioning
What is SCIM Provisioning?
SCIM supports the exchange of user identity data between an enterprise identity provider (or an identity and access management system) and cloud service providers by providing an easy way to grant users access to cloud-based applications, while keeping sensitive data secure. It alleviates the burden of manual provisioning and gives employees a frictionless user experience.
Please contact your Swisscom contact person to get the Swisscom counterpart configured and receive the needed Token.
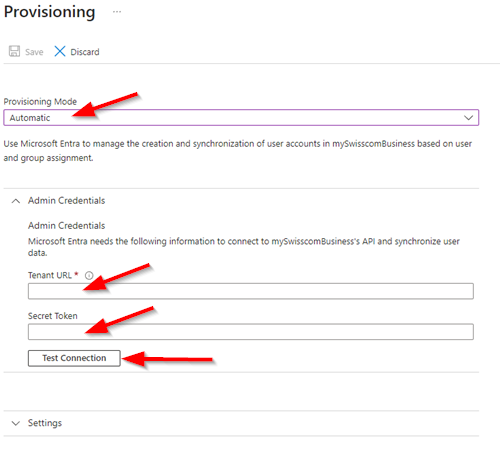
If You configure the SCIM provisioning with Powershell, you will need to add the Tenant URL and the Secret Token after the configuration.
| Step | Description |
|---|---|
| 1. On Provisioning select Get Started | 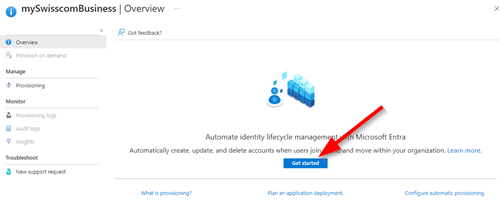 |
| 2. Select Provisioning Mode: Automatic In Tenant URL and Secret Token, enter the received Information from Swisscom Select Test Connection if ready. |
 |
| 3. In the Mapping section, set group provisioning to no |  |
Configure the Attribute Mappings as follows:
| Azure Active Directory Attribute | customappsso Attribute | matching precedence |
|---|---|---|
| objectid | externalid | 1 |
| userPrincipalName | userName | 2 |
| Switch([IsSoftDeleted],, “False”, “True”, “True”, “False”) | active | |
| emails[type eq “work”].value | ||
| givenName | name.givenName | |
| surname | name,familyname | |
| Join(" “,[givenName],[surname]) | name.formatted | |
| streetAddress | addresses[type eq “work”].streetAddress | |
| city | addresses[type eq “work”].locality | |
| postalCode | addresses[type eq “work”].postalCode | |
| Replace([country],,"^(?i)(Schweiz|Switzerland|Suisse|Svizzera)$”,,“CH”,,) | addresses[type eq “work”].country | |
| Replace([mobile],,"[()\s-]+",,"",,) | phoneNumbers[type eq “mobile”].value | |
| department | urn:ietf:params:scim:schemas:extension:enterprise:2.0:User: departement |
|
| User | urn:ietf:params:scim:schemas:swisscom:2.0.User:unifiedRoles | |
| manager | urn:ietf:params:scim:schemas:swisscom:2.0.User:managerExternalId |
| Step | Description |
|---|---|
| 4. Select Show advanced options and select Edit attribute list for customappsso |  |
| 5. Make sure Multi-Value is checked for the unifiedRoles attribute | 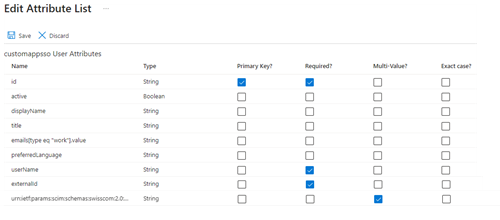 |
|
|
3. Define the users and groups for the Swisscom SSO integration
Which users should be in scope
In order to manage users and their workplaces through the My Swisscom Business portal, these users need to be in the scope of the previously configured SAML Federation and SCIM Provisioning.
As part of the onboarding process, the Entra-ID groups that contain the relevant users to be added, will be defined by the customer together with the Swisscom contact person.
User will be handled via SAML and provisioned via SCIM only if they are added to the Enterprise Application in Azure AD.
| Step | Description |
|---|---|
| 6. Select Users and groups from the navigation menu | 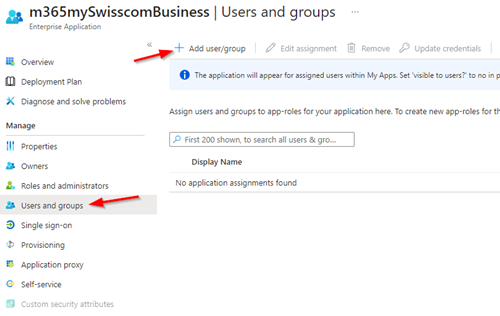 |
| 7. Select None selected |  |
| 8. Select the group or user you want to synchronise and select Select | 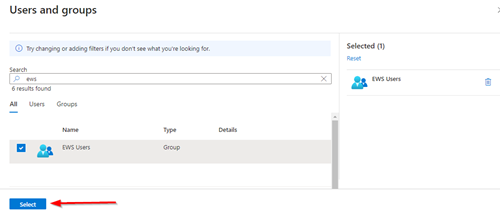 |
| 9. Select Assign | 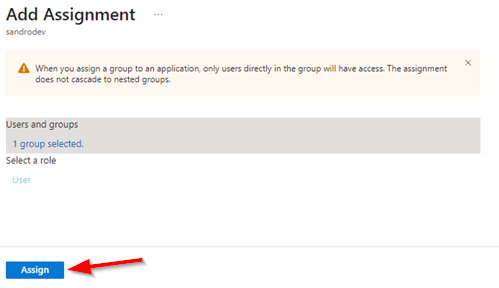 |
In order to test the SAML configuration, sign in to the mySwisscomBusiness center with an account in the customer’s tenant.
You should be redirected to sign in with your Azure account.